
Reviewed by the BeautynFacts editorial team. Last updated: May 2026. Graphic eyeliner is the defining eye-makeup trend of 2026, marking the most de
Reviewed by the BeautynFacts editorial team. Last updated: May 2026.
Graphic eyeliner is the defining eye-makeup trend of 2026, marking the most decisive break yet from the clean-girl minimalism that dominated the last few years. Where the past three seasons celebrated invisible bases and barely-there mascara, graphic eyeliner asks for the opposite: deliberate shape, visible technique, and a willingness to let the eye carry the entire face. Makeup artists, social-media beauty editors, and runway looks have all converged on the same message: bold is back. This guide walks through seven graphic eyeliner looks step by step, explains how to adapt the technique to hooded, monolid, almond, and round eyes, and covers the tools, fixes, and removal habits that make the difference between a sharp graphic eyeliner look and a smudged afternoon mess.
What is graphic eyeliner and why it is trending in 2026
Graphic eyeliner is any eyeliner design that goes beyond the classic single line along the upper lash root. It includes a floating liner above the crease, double-winged designs, extended outer corners that reach toward the temple, negative-space cut creases that leave a deliberate gap of bare skin, dotted graphic lines that read more as ornament than outline, asymmetric designs that play one eye differently from the other, and colour-pop variations in cobalt, emerald, or crimson instead of black.
The 2026 resurgence is not nostalgic. It draws inspiration from the late-1960s mod era and the editorial graphic looks of the 1980s, but it is shaped by 2026’s tools: long-wearing liquid liners that do not migrate, fine-tipped felt pens that allow architectural precision, and the widespread social-media visibility of TikTok and Pinterest tutorials, which have elevated the techniques from runway exclusivity to everyday wear. The category does not require professional ability, but it does reward a few minutes of practice and a willingness to start over if a wing fails.
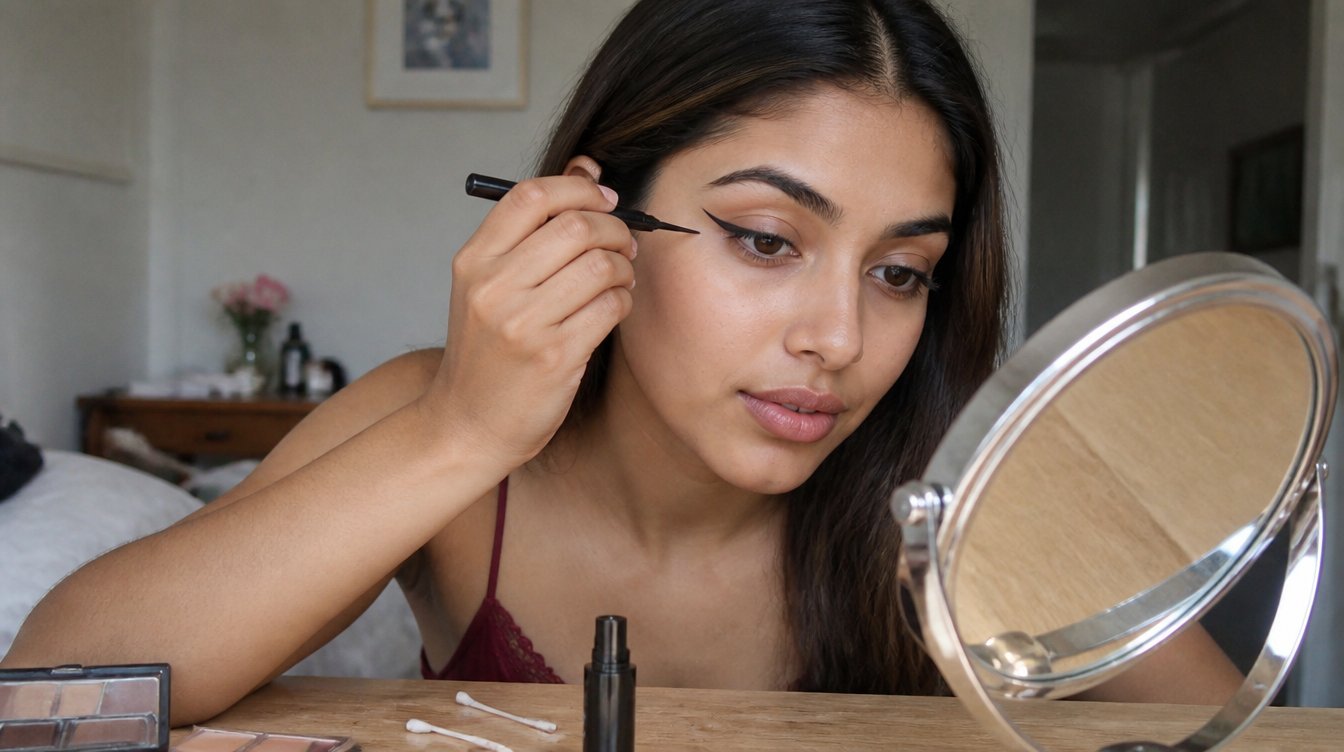
Tools and products for graphic eyeliner
The right tools collapse the learning curve. A fine-tipped liquid eyeliner pen with a felt or brush applicator is the most forgiving choice for beginners. Look for tip widths between 0.5 and 1.5 millimetres. A gel liner in a pot, applied with a small angled brush, gives the most control for thicker graphic shapes but takes practice. A pencil liner is the wrong tool for graphic eyeliner; it cannot produce the crisp edge the look depends on.
Beyond the liner itself, a graphic eyeliner kit needs a flat eye primer to keep the design from fading or migrating, a small handheld mirror angled to show your full face rather than just the eye, cotton swabs and a light-textured concealer for fixes, and a steady surface to rest your elbow on. The elbow rest is the single most underrated detail. A floating hand wobbles; a rested hand draws clean lines.
For removal, a dedicated dual-phase eye-makeup remover or a balm-based cleanser is essential. The long-wear liners that allow graphic eyeliner to survive the day are too tenacious for simple water-and-soap cleansing, and dragging at the lash line trying to remove them is how people end up losing lashes.
Seven graphic eyeliner looks with step-by-step
The following seven graphic eyeliner designs cover the range from subtly adventurous to fully editorial. Start with the easier ones and work toward the bolder shapes.
Floating liner above the crease
Map the crease of the eye with a light touch of brown eyeshadow to locate the natural fold. Then draw a sharp graphic eyeliner line about two to four millimetres above that crease, parallel to it, starting from the inner third of the eye and extending past the outer corner. Leave the lash line completely bare. The effect reads as a floating second eyebrow, modern and architectural. Works best on eye shapes with visible crease space, so almond and round eyes have the easiest time.
Double-winged graphic eyeliner
Begin with a clean cat-eye along the upper lash line and extend it into a sharp outer wing. Then, starting at the outer corner, draw a second wing along the lower lash line that mirrors the upper wing but does not connect to it. The two wings should appear to bracket the outer corner rather than meet. This is the most photographed graphic eyeliner shape on social media in 2026 because it photographs beautifully and works on most eye shapes.
Extended outer corner
A classic cat-eye stops at the outer corner. The extended outer corner pushes the wing horizontally toward the temple, sometimes by as much as two centimetres. The line stays thin and sharp throughout. The effect elongates and lifts the eye dramatically. Works well on round and downturned eyes that benefit from the horizontal stretch; it’s less suited to already-elongated eyes that risk looking pulled.
Negative-space cut crease
Map the crease, then draw a thin graphic eyeliner line above it, following its natural curve. Leave the space between the lash line and that upper line completely bare, with no shadow and no liner. The bare skin reads as a deliberate negative-space band. The trick is to keep the bare area genuinely clean, which means avoiding heavy concealer underneath that could oxidise during the day.
Dotted graphic line
Instead of a continuous line, place a series of small dots along the lash line or above the crease. The dots can be evenly spaced or graduated in size. The effect is decorative rather than structural, reading more as adornment than as conventional eye makeup. Pair with a single coat of mascara to keep the lashes from competing with the dot pattern.
Asymmetric graphic eyeliner
Apply one technique on one eye and a contrasting technique on the other. The most common pairing is a clean classic cat-eye on one side and a more elaborate graphic shape on the other. The look is deliberately editorial and not for every occasion, but it is one of the most-photographed graphic eyeliner trends of 2026 on social media because it disrupts expected symmetry.
Color-pop graphic liner
Substitute a saturated colour (cobalt, emerald, scarlet, or electric violet) for black in any of the shapes above. The double wing in cobalt or the extended outer corner in emerald is the gateway colour-pop look. A primer is non-negotiable, as coloured long-wear liners are more prone to feathering than their black counterparts.
Graphic eyeliner by eye shape
Eye shape is the key variable that determines which designs flatter your features and which ones work against them. The same graphic eyeliner that opens up a round eye can close down a hooded eye.
Hooded eyes
Hooded eyes have a fold of skin that covers part of the mobile lid when the eye is open. Graphic eyeliner that lives entirely above the natural crease (the floating liner technique) often disappears on hooded eyes because the hood covers it. The fix is to draw the design with the eye open and to adjust the placement higher than feels natural so that the design is visible when looking straight ahead. Double-winged and extended outer corner shapes work well; floating liner and full negative-space cut creases are harder.
Monolid eyes
Monolid eyes have a smooth upper lid without a visible crease. This means there is no crease for the liner to land in or to work around. Graphic eyeliner on monolid eyes typically lives close to the lash line and uses thickness rather than placement to create the design. Bold extended outer corners, dotted graphic lines, and colour pops translate beautifully. Floating liner above an invisible crease does not work as well.
Almond eyes
Almond eyes are the most accommodating shape for graphic eyeliner. The visible crease, the lifted outer corner, and the balanced proportions mean almost every graphic technique works. Use this advantage to experiment with the more editorial designs first.
Round eyes
Round eyes benefit from horizontal-elongating graphic shapes. Extended outer corners, double-wings, and asymmetric designs that lengthen the eye are flattering. Avoid designs that emphasise the vertical (very tall floating liners and dramatically high-cut creases), as they can make the eyes look surprised rather than chic. For more on tailoring makeup to specific eye situations, our guide to makeup for glasses covers the additional adjustments needed when frames sit in front of the design.
Common mistakes and quick fixes
Five errors account for almost every graphic eyeliner failure.
First, drawing the wing while looking down is a mistake. Looking down stretches the eye skin upward and changes the angle of the wing. When the eye returns to its normal position, the wing reads as wrong. Always assess the design with the eye open and looking straight ahead.
Second, starting with thick lines. Sharp graphic eyeliner is built up in thin layers. A first thin pass establishes the shape; subsequent layers add thickness only where needed. Starting thick locks you into mistakes that you cannot correct without starting over.
Third, skipping the primer. Without a primer, even long-wear graphic eyeliner can transfer to the brow bone and smudge by mid-afternoon. A thin layer of eye primer doubles the wear time of any design.
Fourth, forcing symmetry. Eye shape is rarely perfectly symmetric. Trying to match wings millimetre for millimetre usually makes both look wrong. Aim for visual balance rather than mathematical equality, and remember that the asymmetric look is itself trendy this year.
Fifth, use a wet cotton swab to correct mistakes. Wet swabs smear long-wear liner rather than removing it cleanly. Use a swab dipped in micellar water or, better, a small flat brush dipped in concealer to “redraw” the edge sharply.
How to make graphic eyeliner last all day
The longevity formula for graphic eyeliner is a clean lid; primer; long-wear liner in thin layers, set with a translucent powder if needed, and avoid touching the design throughout the day. People who report fading or migration usually skip the primer step or apply liner over an oily lid.
For very humid climates or long days, a clear setting spray with a fine mist nozzle adds another hour or two of wear. Spray from a slight distance with eyes closed; do not aim directly at the design.
Eye drops with redness-relief ingredients can also dissolve graphic eyeliner if the drops touch the design. If you wear contacts or use eye drops, take care to dab dry immediately rather than letting the drops run.
How to remove graphic eyeliner without damaging lashes
The long-wear liners that make graphic eyeliner possible are also the hardest to remove. Soak a cotton pad in dual-phase eye-makeup remover, press onto the closed eye for ten to fifteen seconds, then wipe gently outward. Do not scrub. For stubborn liner in the inner corner, use a cotton swab dipped in remover. A second cleanse with a balm or oil-based cleanser ensures no residue is left behind to clog pores or irritate the eye area.
Removing graphic eyeliner aggressively is the single fastest way to lose eyelashes and create premature wrinkles in the delicate skin around the eye. Treat the removal as a slow, deliberate step, not a rushed end-of-day chore. For sibling techniques in this category, our guides to the reverse cat eye and the latte makeup monochrome trend walk through complementary looks that pair well with graphic eyeliner across an outfit week.
Frequently asked questions
What is the difference between graphic eyeliner and regular eyeliner?
Regular eyeliner is a single line along the upper lash root, sometimes extended into a small wing at the outer corner. Graphic eyeliner is any design that goes beyond that single line, including floating liner above the crease, double wings, extended outer corners, negative-space cut creases, dots, asymmetric designs, and colour pops. The intent of graphic eyeliner is decorative and architectural rather than purely functional.
Can I do graphic eyeliner with hooded eyes?
Yes, but the design choices matter. A floating liner above the crease tends to disappear under the hood when the eye is open, so adjust the placement higher than feels natural and draw with your eye open. Double-winged and extended outer corner shapes work very well on hooded eyes because they live close to or below the hood line. Map the design in a mirror with your eye open, rather than with your eye looking down.
What kind of eyeliner is best for graphic looks?
A long-wear liquid eyeliner with a fine felt tip is the most forgiving option for beginners and produces the cleanest edges. Tip widths between 0.5 and 1.5 millimetres allow precise architectural work. Gel liners in a pot with a small angled brush give more control for thicker designs but require practice. Pencil liners are too soft to hold a crisp graphic shape and should be avoided for this look.
How do I make graphic eyeliner stay all day?
Start with a clean, oil-free lid. Apply a thin layer of eye primer. Use a long-wear liquid eyeliner in thin building layers rather than a single thick line. Set with a fine dusting of translucent powder over the browbone area, not directly on the design. Avoid touching the eye area through the day, and dab dry immediately if eye drops or sweat run near the design.
Is graphic eyeliner appropriate for daytime?
Many graphic eyeliner designs work for daytime, including subtle floating liner, a clean extended outer corner, and the milder double-winged shapes. The more editorial designs (colour pops in saturated shades, fully asymmetric looks, and large dotted graphic patterns) are better suited to evening or creative settings. The visibility of the design is controlled by line thickness as much as by shape, so a thin double wing in classic black can be office-appropriate, whereas the same shape drawn thickly reads as evening.
How can I correct mistakes in graphic eyeliner without redoing everything?
Use a small flat brush dipped in concealer to redraw the edge of the design where it went wrong. The concealer covers the mistake and lets you re-establish a sharp line without disturbing the rest of the design. A wet cotton swab tends to smear long-wear liner and create a bigger mess; the concealer method gives a cleaner correction. For larger mistakes, dampen a cotton pad with eye-makeup remover, hold it against the closed eye for ten seconds, and wipe outward, then redraw from that section.
Related Articles
- Reverse Cat Eye: How to Master the Inverted Wing
- Latte Makeup: The Warm Monochrome Eye Trend of 2026
- Makeup for Glasses: 7 Eye Looks That Stand Out Behind Lenses
COMMENTS