
A reflexology foot massage during a pedicure does more than relax tired feet, because the principles of reflexology link specific points on the soles
A reflexology foot massage during a pedicure does more than relax tired feet, because the principles of reflexology link specific points on the soles to organ systems throughout the body. A reflexology foot massage adds therapeutic value to what would otherwise be a purely cosmetic service, and the technique is simple enough to add to any home pedicure. This guide walks through reflexology foot massage with the key pressure points, the pressure to apply, and the surprising benefits each point delivers.
Reviewed by the BeautynFacts editorial team. Last updated: May 2026.
The Origins of Reflexology and Zone Theory
The detail most guides skip on reflexology foot massage: results compound only when small habits stack. Two careful choices today are worth more than ten half-followed ones, and reflexology foot massage rewards consistency over weeks, not chasing a single perfect product.
Reflexology is not a modern invention. Evidence of therapeutic footwork appears in ancient Egyptian tomb paintings dating back to roughly 2330 BCE, where figures can clearly be seen applying pressure to each other’s hands and feet. Similar traditions emerged independently in ancient China and India, where the feet were understood to be energetic maps of the entire body. Traditional Chinese Medicine incorporated footpoint stimulation into broader treatment systems that also included acupuncture and herbal remedies, operating on the principle that life energy, called ‘qi’, flows through pathways in the body and that blockages in those pathways produce illness and discomfort.
The version of reflexology most widely practised in Western beauty and wellness settings today traces its modern foundations to the early twentieth century. American physician Dr William Fitzgerald developed what he called ‘Zone Therapy’ around 1913. Fitzgerald proposed that the body could be divided into ten vertical zones, five on each side, running from the top of the head down through the torso and into each foot and hand. He observed that applying pressure to one point within a zone could produce an analgesic or therapeutic effect somewhere else in the same zone.
Eunice Ingham, a physiotherapist working in the 1930s, refined and expanded Fitzgerald’s zone theory into the detailed foot maps that reflexology practitioners use today. Ingham spent years mapping which areas of the foot corresponded to which organs, glands, and body structures. Her work produced the reflexology charts that show the spine running along the inner arch, the brain and sinuses represented in the toes, the digestive organs mapped across the ball and mid-section of the foot, and the reproductive and pelvic organs mapped in the heel. Modern reflexology training still draws heavily on Ingham’s foundational research, and her charts appear, in various forms, in salons and wellness studios around the world.
The underlying theory holds that the body contains approximately 7,200 nerve endings in each foot and that these nerve endings connect, through the peripheral nervous system, to every organ and structure in the body. Applying focused pressure to a reflex point sends signals through those nerve pathways that can release muscular tension, improve circulation to corresponding organs, and prompt the body’s own regulatory mechanisms to function more effectively. While the mechanisms are still the subject of ongoing scientific inquiry, multiple studies have found measurable effects on heart rate, blood pressure, cortisol levels, and reported pain levels following reflexology sessions.
How Reflexology Differs from a Regular Foot Massage
The distinction matters, because the two practices feel similar on the surface but have fundamentally different intentions. A conventional foot massage focuses on the muscles, tendons, and soft tissues of the foot itself. The goal is to release physical tension in the plantar fascia, ease cramping in the arch, soften the heel, and improve the flexibility of the ankle joint. It is therapeutic for foot health, and it certainly feels wonderful, but its benefits are primarily local.
Reflexology, by contrast, treats the foot as a representation of the whole body. A reflexologist does not simply rub wherever feels tight. Instead, she works systematically through a map, applying precise pressure to specific points regardless of whether those points feel tense. The pressure technique is also different: reflexology uses a caterpillar-like thumb-walking movement and specific finger-rotation techniques rather than the long, gliding strokes of a Swedish massage. The therapist moves deliberately and methodically, spending focused time on each zone and paying particular attention to points that feel granular, tender, or congested, because those sensations may indicate that the corresponding body part needs attention.
Another key distinction is that the benefits of reflexology are intended to be felt throughout the body, not just in the feet. A client who arrives with sinus congestion may notice that her breathing feels clearer after focused work on the toe tips. Someone dealing with chronic lower back tension might find that pressure along the inner arch of the foot, which maps to the spine, brings noticeable relief. This systemic intention is what sets reflexology apart as a holistic wellness practice rather than a purely physical treatment.
When you integrate reflexology into a pedicure, you get the best of both worlds: the cosmetic care of nail shaping, cuticle work, and skin smoothing combined with the deeper, body-wide benefits of zone-specific pressure. It requires only a modest addition of time and intention, but the results can be significantly more satisfying than a standard pedicure finish.
Understanding the Main Reflex Zones of the Foot
Worth pausing on with reflexology foot massage: the products matter less than the order and timing. The same shelf can deliver visible reflexology foot massage results or flat ones depending on the layering.
Before applying any technique, it helps to understand the landscape. The reflexology map of the foot divides into several broad regions, each corresponding to a different area of the body. The following breakdown covers the zones most relevant to beauty-focused wellness goals.
The Head and Neck Zone
The toes represent the head and all its structures. The big toe corresponds to the brain, the pituitary gland, and the pineal gland. The tip of the big toe maps to the top of the head and the crown, while the base of the big toe connects to the neck and the cervical spine. The smaller toes map to the sinuses, eyes, ears, and temples. Working through all five toes addresses the full scope of the head and neck regions.
This zone is particularly valuable for anyone who experiences tension headaches, sinus pressure, eye strain from screen time, or neck stiffness that builds through the day. Because so many modern beauty clients carry significant tension in the head and neck, beginning a reflexology sequence with toe work almost always produces an immediate and noticeable sense of relief.
The Spine Zone
The inner edge of each foot, running from the big toenail down along the inner arch and ending at the inner heel, maps to the entire spine. The cervical vertebrae (neck) correspond to the inner side of the big toe. Moving down the inner arch takes you through the thoracic vertebrae (mid-back), then into the lumbar region (lower back) at the widest part of the arch, and finally into the sacrum and coccyx at the inner heel.
This zone is one of the most consistently productive in reflexology. Poor posture, prolonged sitting, and the physical demands of carrying bags, children, or work stress all accumulate in the spine. Systematic pressure along the inner arch and inner heel often produces a deeply satisfying release that clients describe as a wave of relaxation spreading up through the back.
The Chest, Heart, and Lung Zone
The ball of the foot, the raised padded area just below the toes, maps to the chest cavity. On the left foot, the heart reflex is located in the upper portion of the ball, slightly toward the inner side. The lungs are represented across the entire ball of the foot on both feet, with the left foot mapping the left lung and the right foot mapping the right lung. The solar plexus point, one of the most powerful relaxation points in reflexology, sits just below the centre of the ball of the foot, at roughly the junction where the ball meets the arch.
Stimulating the lung and heart zones can support deeper breathing, ease chest tightness associated with anxiety, and encourage cardiovascular circulation. The solar plexus point in particular is often used at the beginning and end of a reflexology session as an anchor for relaxation, because sustained gentle pressure on this point tends to produce an almost immediate calming effect on the nervous system.
The Digestive Zone
The mid-section of the foot, stretching from the lower edge of the ball down through the arch, maps to the digestive system. The stomach reflex sits just below the ball of the left foot, toward the inner side. The small intestine is represented across the centre of the arch on both feet. The large intestine traces a path in a roughly rectangular pattern across both feet, following the actual anatomical path of the colon: up the right side of the right foot (ascending colon), across both feet (transverse colon), and down the left side of the left foot (descending colon). The liver and gallbladder reflexes are found on the right foot in the area between the ball and mid-arch, toward the outer edge.
Digestive reflexology work can be particularly supportive for clients who experience bloating, sluggish digestion, or the kind of mid-afternoon heaviness that follows a large meal. Many people also find that abdominal stress and emotional tension are stored together and that working the digestive zone produces an unexpected emotional release alongside physical relief.
The Reproductive and Pelvic Zone
The heel of the foot maps to the pelvis and the reproductive organs. The uterus or prostate reflex is located on the inner heel, roughly midway between the ankle bone and the base of the heel. The ovary or testis reflex mirrors this on the outer heel. The fallopian tubes or vas deferens are represented along the top of the foot, in the groove running across the ankle from the inner to the outer side.
For women, this zone is particularly relevant. Regular reflexology work in the heel area has been associated in some studies with reduced menstrual cramping, more regulated cycles, and eased symptoms of premenstrual syndrome. The heel zone also corresponds to the lower back and sciatic nerve, making it valuable for anyone who experiences sacral or pelvic tension. Because the heel is also the thickest, toughest part of the foot, this zone requires firmer pressure to be effective.
The Lymphatic and Immune Zone
The lymphatic system does not have a single concentrated zone but is instead represented at several points across the foot. The lymph nodes of the groin are mapped to the top of the foot along the ankle crease. The thoracic lymph nodes correspond to the webbing between the toes and the upper surface of the ball of the foot. The spleen reflex, an important immune organ, is found on the outer edge of the left foot, roughly level with the mid-arch.
Stimulating lymphatic reflexes can support the body’s natural detoxification processes, which is a particularly fitting complement to a pedicure session that may include exfoliation, soaking, and skin treatment. Many reflexologists incorporate lymphatic drainage techniques at the beginning of a session to prepare the body to receive the deeper work that follows.
Step-by-Step Reflexology Techniques for Each Zone
Effective reflexology depends on specific hand movements applied with appropriate pressure. The following techniques cover the core toolkit that can be applied during a pedicure session.
The Thumb-Walking Technique
This is the foundational reflexology movement. Bend the thumb slightly at the first joint, so the tip of the thumb is the contact point. Press into the skin and then, without lifting the thumb, bend and unbend it in tiny increments, moving forward like a caterpillar. Each tiny forward movement covers about two to three millimetres of skin. This motion delivers consistent, focused pressure along a line of reflex points rather than sliding over the surface. Use this technique along the spine zone, across the ball of the foot, and through the heel area.
The Finger-Walking Technique
Identical in principle to thumb-walking but uses the index or middle finger instead. This technique is better suited to the top of the foot and the areas between the toe tendons, where the thumb is too large to work precisely. Use finger-walking across the lymphatic zones on the top of the foot and along the ankle crease.
The Rotation-on-a-Point Technique
Press the thumb or a knuckle into a specific reflex point and then, keeping that pressure constant, gently rotate the foot around the point of pressure rather than moving the hand. This technique is particularly effective for isolated points like the solar plexus, the pituitary gland on the tip of the big toe, and the uterus or ovary points on the heel. Hold the foot with one hand and use the other to apply the rotation, maintaining steady contact throughout.
The Hook-and-Backup Technique
Used for very precise, deeply situated reflex points. Press the thumb into the point at a slight angle, then pull back against the tissue rather than pressing straight in. This creates a hooking action that allows you to access points that are small or that sit beneath thicker tissue. The pituitary point in the centre of the big toe pad responds well to this technique.
Knuckle Press
Form a loose fist and use the flat surface of the middle phalanges (the middle section of the fingers, between the two joints). Drag the knuckles slowly across the arch of the foot or rock them back and forth across the ball of the foot with firm, even pressure. This technique covers larger zones efficiently and is especially effective for the digestive zone across the mid-arch, where the tissue is thicker and requires more sustained pressure than thumb-walking alone can deliver.
Integrating Reflexology into a Pedicure Session
A reflexology sequence fits naturally into the massage phase of a pedicure, which typically comes after soaking, exfoliation, and cuticle care but before the application of polish. The following sequence describes how to structure the integration for maximum benefit.
Preparing the Feet
The soak phase of a pedicure is actually a valuable reflexology preparation step. Warm water softens the skin, increases local circulation, and begins to relax the muscles of the foot, making the reflex points more receptive to pressure. Adding Epsom salts to the soak provides additional benefit: magnesium sulphate is absorbed through the skin and contributes to muscle relaxation. A few drops of lavender or peppermint essential oil in the water heightens the sensory experience and begins the nervous system’s shift toward parasympathetic relaxation before the hands even touch the foot.
After soaking and performing any exfoliation or cuticle work, apply a light layer of massage oil or lotion to both feet. Avoid heavy, greasy formulas that make it difficult to maintain grip on the foot. A blend of sweet almond oil with a few drops of essential oil works beautifully and provides just enough slip for smooth technique without losing the friction needed for effective reflexology pressure.
Opening the Session
Begin with both hands wrapped around the foot, applying a gentle, even squeeze from heel to toe and back. This effleurage-style warm-up signals to the nervous system that intentional touch is beginning and creates a moment of connection between the giver and the receiver. Follow this with three to five slow, broad thumb strokes up the sole of the foot from heel to toe, covering the full plantar surface. These opening movements are not a reflexology technique yet, but they prepare the tissue and establish the rhythm of the session.
Then locate the solar plexus point. It sits in the soft depression just below the ball of the foot, at roughly the centre of the foot’s width. Place both thumbs on the solar plexus points of both feet simultaneously, and ask the client or yourself to take a slow, deep breath. Apply gentle pressure as the breath comes in and release slightly as the breath goes out. Repeat three to five times. This simple sequence activates the parasympathetic nervous system and deepens the sense of relaxation before the more specific zone work begins.
The Head and Neck Sequence
Work each toe individually using thumb-walking along the plantar surface and gentle rolling between the finger and thumb along the sides. Spend extra time on the big toe, using the hook-and-backup technique on the centre of the toe pad to address the pituitary point, then thumb-walking down the inner side of the big toe to reach the neck and cervical spine reflex. Follow with light finger pressure along the top side of each smaller toe to stimulate the sinus reflexes. Complete the sequence by gently rotating each toe three times in each direction.
The Chest and Lung Sequence
Use thumb-walking across the entire ball of the foot, moving in horizontal rows from the inner edge to the outer edge. Then use the knuckle press technique with slow, deliberate strokes across the ball. Return to the solar plexus point and hold for a count of ten. This sequence typically produces visible softening in the client’s shoulders and face.
The Spine Sequence
Begin at the inner side of the big toe and thumb-walk down the entire inner edge of the foot, following the bony ridge of the first metatarsal and tarsal bones. Move slowly and evenly, taking approximately sixty seconds to travel from the base of the big toe to the inner heel. Repeat the sequence two to three times. On the final pass, pause at any points that feel particularly granular or sensitive and apply the rotation-on-a-point technique for several seconds before continuing.
The Digestive Zone Sequence
On the right foot, thumb-walk diagonally across the mid-arch from the inner side to the outer side, covering the small intestine and large intestine reflexes. Then use the knuckle press across the same region. On the left foot, begin just below the ball on the inner side (stomach reflex) and thumb-walk across and down through the arch. Follow the path of the descending colon down the outer portion of the left mid-arch. Gentle clockwise circular pressure with the flat thumb pad on the stomach reflex can be particularly soothing for clients who mention digestive discomfort.
The Heel and Pelvic Zone Sequence
The heel requires firmer pressure than any other zone because the skin and subcutaneous tissue here are thicker. Use the knuckle press across the full heel pad with meaningful, sustained pressure. Then locate the inner heel point (uterus reflex) and apply the rotation-on-a-point technique for thirty seconds. Repeat on the outer heel point (ovary reflex). These points are often tender in women in the days before or during menstruation, and gentle sustained pressure rather than deep drilling is appropriate in those cases.
Closing the Session
Return to the solar plexus point for a closing hold, mirroring the opening of the session. Then perform three to five long effleurage strokes from heel to toe. Finish by cupping both hands around the foot for a moment of stillness. This closing ritual signals that the reflexology work is complete and allows the nervous system to integrate the session before the client returns to ordinary awareness. Allow at least two to three minutes of rest before moving on to nail polish application, both to let the oil absorb and to honour the deeply relaxed state the client has reached.
Pressure Point Tools That Enhance the Experience
While skilled hands are the most precise reflexology instruments available, certain tools can enhance or extend the practice, particularly for self-massage where sustained hand pressure can be tiring.
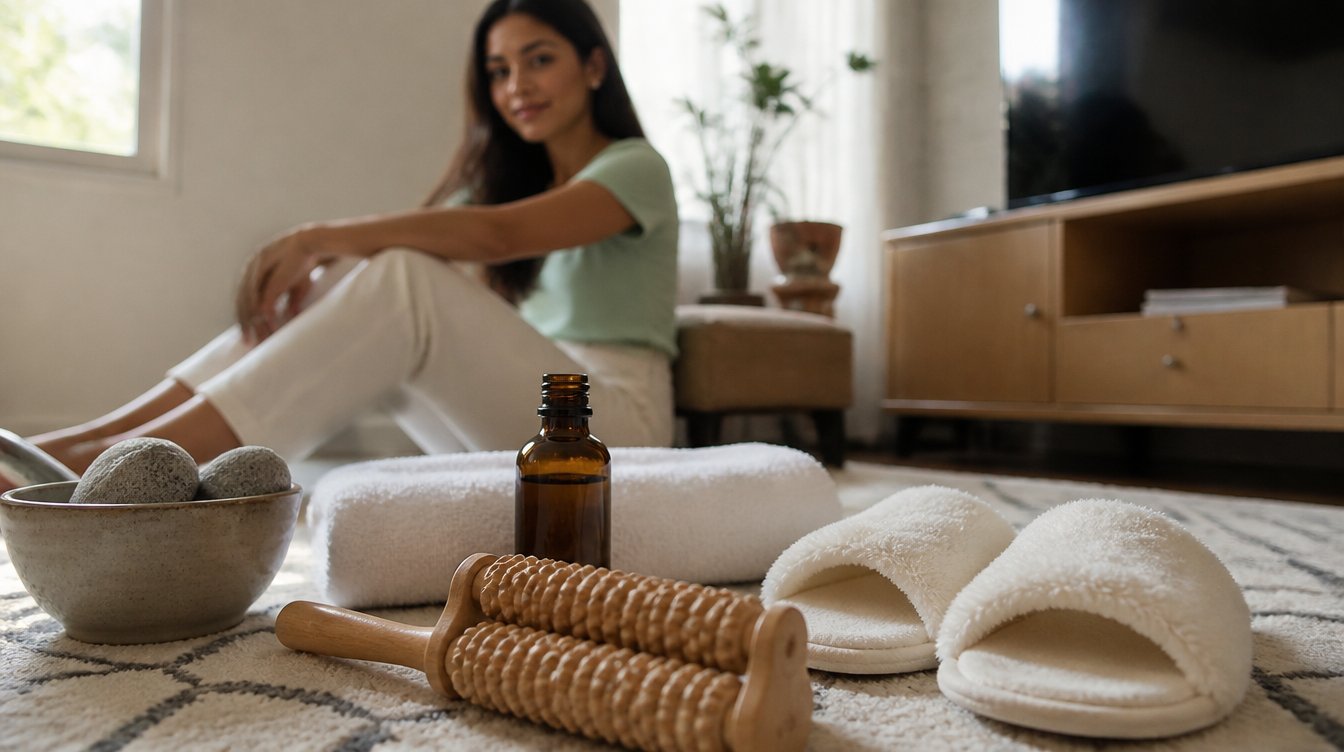
A wooden foot roller is perhaps the most accessible tool. These simple devices, available in smooth wood or with textured ridges, are placed on the floor and rolled under the arch of the foot with varying degrees of body weight applied. They stimulate the digestive and spine zones broadly and are a pleasant way to begin waking up the reflex points before more focused work.
Reflexology sandals or foot mats feature raised nodules that stimulate the sole of the foot with each step. Standing on one of these mats for five to ten minutes while performing another task delivers broad, generalised stimulation across all zones. They are not a substitute for targeted technique but serve well as a daily maintenance practice between dedicated sessions.
A knuckle-shaped massage stick or a smooth, rounded wooden dowel gives the fingers a break during self-massage sessions that would otherwise cause hand fatigue. The stick applies firm, concentrated pressure and can reach the deeper points in the heel that a fingertip cannot sustain comfortably.
Rubber spiked massage balls allow the foot to roll over a surface that stimulates reflex points from multiple angles simultaneously. Rolling the arch across a massage ball for a few minutes before a dedicated reflexology session serves as a warm-up that amplifies the effectiveness of the thumb-walking that follows.
A Self-Massage Reflexology Guide You Can Follow at Home
You do not need a professional or a full pedicure setup to enjoy the benefits of reflexology. The following sequence requires only a comfortable chair, a small amount of massage oil or rich foot lotion, and fifteen to twenty minutes of uninterrupted time.
Sit in a comfortable chair and bring the right foot to rest on the left knee so the sole faces upward and is easily accessible. Apply a small amount of oil to both hands and rub them together to warm the product before it touches the skin.
Begin with thirty seconds of general warming: use both hands to knead and squeeze the entire foot from heel to toe, as if gently wringing a cloth. Then locate the solar plexus point and hold it with your right thumb for five slow breaths, eyes closed, allowing your shoulders to drop.
Move to the toes. Starting with the big toe, use your right thumb to walk from tip to base along the sole surface in small caterpillar steps. Then use your index finger and thumb to gently squeeze and roll the toe from its base to its tip. Spend about thirty seconds per toe, working across all five. On the big toe, spend extra time at the very centre of the toe pad, applying firm circular pressure to address the pituitary and brain reflex.
Move to the ball of the foot. Use thumb-walking in horizontal rows across the entire ball, working from the inner edge outward. Repeat three times. Then form a loose fist and press the flat of your middle knuckles across the ball in a slow rolling motion. This covers the lung and heart zones and the upper digestive region.
Address the spine zone by running your right thumb along the entire inner edge of the foot, from the base of the big toenail down to the inner heel. Keep the pressure firm and even, moving in small caterpillar steps. Repeat this pass three times, pausing at any tender or granular spots for an additional few seconds of rotation-on-a-point.
Work the mid-arch with thumb-walking in diagonal strokes from inner to outer edge, covering the digestive zone. Follow with knuckle presses across the same area.
Finish the foot with the heel zone. Use your knuckle to apply firm, circular pressure across the full heel pad, then locate the inner and outer heel points and apply rotation-on-a-point technique for thirty seconds each.
Return to the solar plexus point for a closing hold. Then perform five long, slow strokes from heel to toe with your full thumb, covering the entire sole in each stroke. Place both hands around the foot for a final moment of stillness before moving to the left foot and repeating the entire sequence.
After completing both feet, sit quietly for five minutes before standing. Drink a full glass of water following any reflexology session, as the improved circulation and lymphatic stimulation can release metabolic waste products that need to be flushed through the system.
Combining Reflexology with Aromatherapy
Aromatherapy and reflexology form one of the most natural and effective partnerships in the wellness world. Essential oils are absorbed through the skin during massage and also influence the nervous system through the olfactory pathway, meaning that the right scent can deepen the relaxation effect of reflexology work or target a specific wellness goal with remarkable precision.
Lavender essential oil is the classic pairing for any relaxation-focused reflexology session. Its active constituent, linalool, has documented effects on the central nervous system, reducing anxiety markers and promoting sleep readiness. Add two to four drops to a tablespoon of sweet almond or jojoba carrier oil and use this as the massage medium throughout the session.
Peppermint essential oil brings a cooling, stimulating quality that is particularly well suited to working the head and neck zone. The menthol in peppermint activates cold receptors in the skin and produces a sensation of freshness that many people associate with sinus clearing and mental alertness. Use peppermint oil when working the toes and reserve it for the toe-zone portion of the session rather than applying it across the entire foot.
Eucalyptus oil supports respiratory health and pairs beautifully with work on the lung and chest zones. A blend of eucalyptus and lavender in a carrier oil creates a deeply relaxing aroma that also supports easier breathing.
Clary sage is the essential oil most often recommended for reproductive-zone work. It has historically been used to support hormonal balance and ease menstrual discomfort, making it a thoughtful pairing for heel zone reflexology. Use it diluted at no more than one percent concentration (one drop per teaspoon of carrier oil), as it is one of the more potent hormonal oils and should be avoided during pregnancy.
Ginger essential oil supports digestive health and circulation. Adding two drops to the carrier oil used for mid-arch work can amplify the digestive benefits of the zone sequence, as the warming quality of ginger promotes blood flow to the abdominal organs.
When blending for a full-session oil, a simple formula of lavender and frankincense in sweet almond oil creates a grounding, whole-body supportive aroma that complements the systemic nature of reflexology without overwhelming the senses. Frankincense has documented effects on stress hormone levels and brings a depth to the scent profile that balances lavender’s lighter floral note.
How Often to Practise Reflexology
For general wellness maintenance, one reflexology session per week is widely considered the ideal frequency by professional practitioners. This regularity allows the body to build on each session’s effects rather than returning fully to baseline between appointments. Many clients who begin a weekly reflexology routine notice cumulative improvements in sleep quality, digestion, and stress resilience over the course of four to six weeks that would not have been apparent from a single session.
Within a pedicure context, monthly professional pedicures that include a full reflexology sequence provide a valuable anchor, supplemented by the fifteen-to-twenty-minute self-massage routine two to three times per week at home. This combined approach delivers the professional precision of trained hands on a monthly basis with consistent maintenance in between.
During periods of heightened stress, illness recovery, or specific hormonal events such as premenstrual syndrome or perimenopause, increasing the frequency to two or three sessions per week can offer meaningful additional support. In these contexts, keeping sessions gentle rather than deeply intensive is generally more productive, as the body needs supportive rather than stimulating input.
Daily self-foot massage, even without following the full reflexology protocol, contributes to foot health, circulation, and nervous system regulation. Standing on a reflexology mat for ten minutes each morning while making coffee, or rolling a massage ball under the feet in the evening, keeps the reflex points active without requiring dedicated session time.
Cautions and Who Should Approach Reflexology Carefully
Reflexology is a gentle, non-invasive practice, and the vast majority of people can enjoy it safely. However, certain conditions warrant caution, modification, or consultation with a healthcare provider before beginning.
Pregnancy requires special consideration. While gentle foot massage is generally safe during pregnancy, certain reflex points, particularly the uterus, ovary, and pituitary points, are traditionally considered contraindicated during the first trimester because of their potential to stimulate uterine activity. From the second trimester onwards, reflexology has been studied as a support for pregnancy discomforts, including back pain, swelling, and anxiety, but it should be practised by a therapist trained in pregnancy reflexology rather than attempted aggressively at home.
Active foot injuries, including fractures; sprains; open wounds; fungal infections such as athlete’s foot; plantar warts; and active blood clots (deep vein thrombosis) in the leg or foot are absolute contraindications to reflexology on the affected foot. Work should either be postponed until the condition resolves or shifted to the hands, which contain the same reflex map as the feet.
People with severe osteoporosis should approach reflexology with caution, as the pressure used in some techniques could theoretically stress fragile bone structures. Gentle effleurage is appropriate; deep knuckle or thumb pressure should be applied very lightly.
Those undergoing cancer treatment should seek clearance from their oncologist before beginning reflexology. There is genuine research interest in reflexology as a complementary support for cancer care, particularly for managing treatment-related fatigue and nausea, but the decision to include it should be made in partnership with the treating medical team.
People with peripheral neuropathy, a condition that reduces sensation in the feet and is common in those with type 2 diabetes, should be particularly careful with self-massage pressure. Reduced sensation means that damage from excessive pressure may not be felt until after injury has occurred. Light pressure only and regular foot inspection are essential for anyone in this category.
Reflexology is a complementary practice, not a replacement for medical care. Anyone using reflexology to support a specific health condition should do so alongside, not instead of, appropriate medical treatment. The practice supports the body’s self-regulating capacities and contributes to overall wellbeing, but it does not diagnose or cure disease.
Frequently Asked Questions About Reflexology During a Pedicure
Will reflexology hurt?
Reflexology should not be painful. Some reflex points may feel tender or sensitive, particularly if the corresponding body area is under stress, but the sensation is typically described as a productive ache rather than sharp pain. If a point feels more than mildly uncomfortable, reduce the pressure and work around the point rather than directly into it. Tenderness often diminishes significantly after one or two sessions as the zone clears.
How long should the reflexology portion of a pedicure last?
A thorough reflexology sequence integrated into a pedicure requires approximately fifteen to twenty-five minutes per foot to cover all the main zones with appropriate depth and care. A full session on both feet therefore adds thirty to fifty minutes to a standard pedicure. Many salons offer an extended pedicure option that accommodates this. If time is limited, prioritising the solar plexus, spine, and head zones gives the most broadly beneficial return in the shortest time.
Can I do reflexology on myself, or do I need a professional?
Self-reflexology is entirely effective and widely practised. The primary limitation compared to professional treatment is hand fatigue: sustaining the thumb-walking technique across a full session can be tiring, which is where massage tools become helpful. Professional sessions also benefit from the therapist’s ability to observe the body’s responses and adjust technique accordingly and from the deeply restful state that comes from receiving rather than giving the work. Both approaches have genuine value, and combining regular professional sessions with more frequent self-massage is the most effective strategy.
Should I drink water after a reflexology session?
Yes, and this recommendation is consistent across virtually all reflexology practitioners and traditions. Reflexology stimulates circulation and lymphatic flow, which mobilises waste products from the tissues into the bloodstream for processing and elimination. Drinking water in the hour following a session supports this detoxification process and helps prevent the mild headache or fatigue that some people experience after their first few sessions.
How quickly will I notice benefits?
Many people notice immediate effects within the first session: a sense of deep relaxation, lighter breathing, or relief from tension in a specific area. Cumulative benefits, such as improved sleep, more consistent digestion, reduced menstrual symptoms, or sustained stress resilience, typically become apparent after four to six weeks of regular practice. The body responds to consistent, repeated input more reliably than to occasional intensive sessions.
Can reflexology replace professional medical treatment?
No. Reflexology is a wellness and complementary care practice. It supports the body’s natural self-regulating functions and contributes to overall wellbeing, but it is not a diagnostic or curative treatment. Anyone dealing with a specific health concern should work with qualified healthcare providers and use reflexology as a supportive addition to, not a replacement for, evidence-based medical care.
Is there a difference between foot reflexology and hand reflexology?
The reflex maps of the hands and feet correspond to the same body zones, and hand reflexology is practised widely, particularly as a self-care tool for people who cannot access or are not comfortable with foot work. The feet are generally considered more responsive to reflexology treatment because the reflex points are larger and the nerve endings more accessible through the plantar surface. However, hand reflexology is an effective alternative when footwork is not possible due to injury, infection, or personal preference.
What should I wear or bring to a reflexology pedicure?
Loose-fitting clothing that can be rolled or pushed up to the knee is ideal, as some reflexologists prefer to work the ankle and lower leg as part of the session. Arrive having cleaned the feet, and avoid applying heavy foot cream immediately before the appointment, as this can make the skin too slippery for precise pressure work. If you have a specific wellness goal for the session, such as tension headache relief or digestive support, mentioning it at the start allows the therapist to prioritise relevant zones.
Making Reflexology a Lasting Part of Your Wellness Routine
The beauty of integrating reflexology into a pedicure is that it elevates an appointment you are already making into something that serves your whole body. The cosmetic benefits of a pedicure, soft skin, shaped nails, and polished toes, remain fully intact, while the addition of zone-specific pressure work transforms the session into a genuine wellness investment.
As you become more familiar with the reflex map and the techniques, you will find that your awareness of your own feet changes. Points that were once simply part of a relaxing foot rub become meaningful signals about your body’s state. A tender solar plexus point on a high-stress week or sensitivity along the spine zone during a period of prolonged desk work becomes useful information rather than an unremarkable ache. This growing body literacy is one of the most quietly powerful outcomes of regular reflexology practice.
Combining that awareness with consistent technique, whether through professional sessions, self-massage, aromatherapy pairings, or simple daily foot rolling, builds a practice that compounds in value over time. The feet carry you through every aspect of your life, and reflexology is a way of honouring that fundamental labour while simultaneously supporting the health and balance of the whole body they carry.
Start with the solar plexus point tonight. Find the soft hollow just below the centre of the ball of your foot, press your thumb gently into it, and take three slow breaths. Notice how your shoulders drop, how the breath deepens, how the day’s accumulated tension begins to soften. That single point, held for thirty seconds, is your entry into a practice with thousands of years of tradition behind it and a growing body of modern research supporting its effects. Everything else in this guide builds from that simple beginning.
RELATED ARTICLES:
Athletic or Sports Pedicure: A Comprehensive Guide for Athletes and Sports Enthusiasts
Waterless Pedicure: A Revolutionary Approach to Foot Care
French Pedicure: A Chic and Timeless Foot Spa Experience
Traditional Foot Care: A Classic Pedicure for Healthy Feet
Say Goodbye to Dry Skin: The Best Ayurvedic Morning & Evening Rituals for Dry Skin!
The honest bottom line on reflexology foot massage: consistency beats complexity. Build a few habits into your weekly rhythm, give your skin or hair a real window to respond, and reflexology foot massage becomes second nature.
COMMENTS